Difference between revisions of "Vinyl Cutter"
From __space Wiki
(Instructions on how to use the Vinyl Cutter) |
(→Preparing Printer) |
||
| (63 intermediate revisions by 6 users not shown) | |||
| Line 1: | Line 1: | ||
| − | + | =Specifications= | |
| − | + | Max. Cutting Width: 600 mm (23.6 in.) | |
| − | |||
| − | |||
| − | |||
| − | |||
| − | |||
| − | |||
| − | |||
| − | |||
| − | |||
| − | |||
| − | |||
| − | |||
| − | |||
| − | |||
| − | |||
| − | |||
| − | |||
| − | |||
| − | |||
| − | |||
| − | |||
| + | Max. Media Width: 719 mm (28.3 in.) | ||
| + | Max. Cutting Speed: 60 cm/sec | ||
| + | Acceptable Material Thickness: 0.8 mm | ||
| − | + | Recommended Pen Speed: 45 cm/s | |
| − | |||
| − | |||
| − | |||
| − | |||
| − | |||
| − | |||
| − | |||
| − | |||
| − | |||
| − | |||
| − | |||
| − | |||
| − | |||
| − | |||
| + | Recommended Pen Force: 35 g | ||
| − | Printing Image | + | =Preparing Image= |
| − | File: Print | + | ==CorelDRAW== |
| − | Printer: Expert Pro-60 | + | '''If you want to know more about using the''' [http://space.apps.uri.edu/wiki/index.php?title=CorelDRAW Corel Draw]''', click on link and follow instructions and settings.''' |
| − | + | ||
| − | Two tabs Option and Paper | + | =Preparing Printer= |
| − | Paper: make sure is roughly the size of vinyl, make sure Metric (mm) | + | *Plug the the USB cord into both the vinyl cutter and the closest USB port on the right side of the computer. |
| − | Option: Pen Speed: 45m/s (more delicate | + | *Turn on the printer (The switch is located on the bottom left side of the printer where the power plug is located). |
| − | “Okay” | + | *Lift the lever located behind the printer, on the right, and slide the vinyl paper through the back, glossy side up. |
| − | Layout Tab: | + | *You should hear the printer “turn on” when the vinyl is inserted and covering the sensor. |
| − | Reposition images to: (drop down menu) Bottom Left corner | + | *Adjust the wheels (The wheels should only be moved from the back of the printer to avoid damage), making sure they are under the white line markers (located on the front of the printer) and on each end of the vinyl paper. |
| − | + | *'''Warning moving the wheels from the front will cause damage to the device.''' | |
| + | *Vinyl paper at minimum needs 2 extra inches lengthwise to cut, '''otherwise the printer will attempt to cut but will be unable to.''' | ||
| + | *Lower the lever. | ||
| + | *<!--For a small sheet of vinyl,--> Hit the 'Right' arrow on the printer.<!-- If using a roll, hit the "up" arrow.--> The printer will size the paper and should return to home. | ||
| + | <!-- *Gently hold the vinyl from the back (NOT from the front) as it is moves backwards and forwards. --> | ||
| + | *Use the arrows to adjust the origin of the blade, if needed. Select "ENTER" to set the new origin. | ||
| + | *The origin is the bottom-left most point of the image on CorelDRAW. <!-- (The origin can be moved for account for tears in the vinyl or cut sections of the vinyl) --> | ||
| + | |||
| + | *Vinyl Paper can be located on a rack located next to the vinyl truck, if you can't find it ask a staff member! | ||
| + | |||
| + | =Tips For Setting Up A Print In CorelDRAW= | ||
| + | * To add a file into CorelDRAW, go to "File," "Import" or use the shortcut (CTRL + I). Typically clip art images work best to cut. | ||
| + | |||
| + | *Your print on the screen from "bottom left to top left" will be the same as the right side starting point on the vinyl cutter to the left. Please be aware of this to minimize waste. Ask a staff member for more clarification if needed. | ||
| + | |||
| + | [[File:example.png|border|caption]] | ||
| + | |||
| + | *When in doubt, select what you wish to cut and hit F12. This will bring up the "Outline Pen" shortcut. Select a color that will stand out on your file (this will not change the color of the vinyl). Change the width to "Hairline" and "Points." Select "Overprint outline" (bottom left box). Finally select "OK." You should notice that your file is outlined in your specified color. If this did not happen, Try the next few steps. | ||
| + | |||
| + | *Select your file and select "Trace Bitmap" on the top toolbar. Select "Outline Trace," then "Detailed Logo." If this is not an option go to "Bitmaps," "Outline trace," "Detailed Logo." Make necessary changes under the "PowerTRACE" menu. When finished select "OK". Select your image again and run through the "Outline Pen" shortcut once more. Your file should now be traced. | ||
| + | |||
| + | * If you are still having trouble, ask a staff member! | ||
| + | |||
| + | =Printing Image= | ||
| + | Refer to photo above in the "Tips For Setting Up A Print In CorelDRAW" section | ||
| + | <ol> | ||
| + | <li>File: Print</li> | ||
| + | <li>Enable Preview</li> | ||
| + | <li>Printer: Expert Pro-60</li> | ||
| + | <ol style="list-style-type:lower-alpha"> | ||
| + | <li>references (to the right of Expert Pro-60)</li> | ||
| + | </ol> | ||
| + | <li>Two tabs Option and Paper</li> | ||
| + | <ol style="list-style-type:lower-alpha"> | ||
| + | <li>Paper: make sure is roughly the size of vinyl, make sure Metric (mm)</li> | ||
| + | <li>Option: Pen Speed: 45m/s (more delicate prints reduce speed), Pen Force 30g (always)</li> | ||
| + | <li>“Okay”</li> | ||
| + | </ol> | ||
| + | <li>Layout Tab</li> | ||
| + | <ol style="list-style-type:lower-alpha"> | ||
| + | <li>Reposition images to: (drop down menu) Bottom Left corner</li> | ||
| + | </ol> | ||
| + | <li>Apply</li> | ||
| + | <li>Print</li> | ||
| + | </ol> | ||
Latest revision as of 15:53, 2 April 2018
Contents
Specifications
Max. Cutting Width: 600 mm (23.6 in.)
Max. Media Width: 719 mm (28.3 in.)
Max. Cutting Speed: 60 cm/sec
Acceptable Material Thickness: 0.8 mm
Recommended Pen Speed: 45 cm/s
Recommended Pen Force: 35 g
Preparing Image
CorelDRAW
If you want to know more about using the Corel Draw, click on link and follow instructions and settings.
Preparing Printer
- Plug the the USB cord into both the vinyl cutter and the closest USB port on the right side of the computer.
- Turn on the printer (The switch is located on the bottom left side of the printer where the power plug is located).
- Lift the lever located behind the printer, on the right, and slide the vinyl paper through the back, glossy side up.
- You should hear the printer “turn on” when the vinyl is inserted and covering the sensor.
- Adjust the wheels (The wheels should only be moved from the back of the printer to avoid damage), making sure they are under the white line markers (located on the front of the printer) and on each end of the vinyl paper.
- Warning moving the wheels from the front will cause damage to the device.
- Vinyl paper at minimum needs 2 extra inches lengthwise to cut, otherwise the printer will attempt to cut but will be unable to.
- Lower the lever.
- Hit the 'Right' arrow on the printer. The printer will size the paper and should return to home.
- Use the arrows to adjust the origin of the blade, if needed. Select "ENTER" to set the new origin.
- The origin is the bottom-left most point of the image on CorelDRAW.
- Vinyl Paper can be located on a rack located next to the vinyl truck, if you can't find it ask a staff member!
Tips For Setting Up A Print In CorelDRAW
- To add a file into CorelDRAW, go to "File," "Import" or use the shortcut (CTRL + I). Typically clip art images work best to cut.
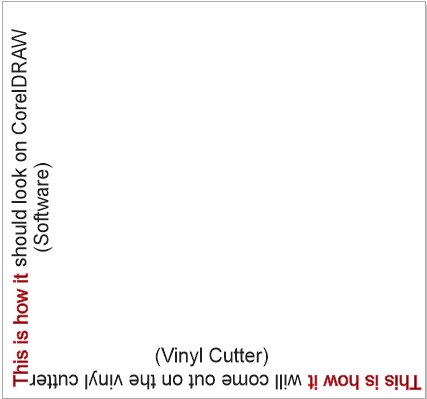
- Your print on the screen from "bottom left to top left" will be the same as the right side starting point on the vinyl cutter to the left. Please be aware of this to minimize waste. Ask a staff member for more clarification if needed.

- When in doubt, select what you wish to cut and hit F12. This will bring up the "Outline Pen" shortcut. Select a color that will stand out on your file (this will not change the color of the vinyl). Change the width to "Hairline" and "Points." Select "Overprint outline" (bottom left box). Finally select "OK." You should notice that your file is outlined in your specified color. If this did not happen, Try the next few steps.
- Select your file and select "Trace Bitmap" on the top toolbar. Select "Outline Trace," then "Detailed Logo." If this is not an option go to "Bitmaps," "Outline trace," "Detailed Logo." Make necessary changes under the "PowerTRACE" menu. When finished select "OK". Select your image again and run through the "Outline Pen" shortcut once more. Your file should now be traced.
- If you are still having trouble, ask a staff member!
Printing Image
Refer to photo above in the "Tips For Setting Up A Print In CorelDRAW" section
- File: Print
- Enable Preview
- Printer: Expert Pro-60
- references (to the right of Expert Pro-60)
- Two tabs Option and Paper
- Paper: make sure is roughly the size of vinyl, make sure Metric (mm)
- Option: Pen Speed: 45m/s (more delicate prints reduce speed), Pen Force 30g (always)
- “Okay”
- Layout Tab
- Reposition images to: (drop down menu) Bottom Left corner
- Apply