Difference between revisions of "Cube 3D Printers"
(→Creating a .CUBE file) |
(→Creating a .CUBE file) |
||
| Line 9: | Line 9: | ||
On any of the available computers in the _Space, locate the app titled "Cube Print" (this should be easily found on the desktop). | On any of the available computers in the _Space, locate the app titled "Cube Print" (this should be easily found on the desktop). | ||
Once the app is open, choose "ADD" on the upper left of the application screen. From here, you can import any .stl or .obj file. | Once the app is open, choose "ADD" on the upper left of the application screen. From here, you can import any .stl or .obj file. | ||
| − | |||
| − | |||
| − | |||
| Line 28: | Line 25: | ||
Choose the color you desire, select set, and the color wheel should have changed. Now, click and hold on the wheel, and drag the color to the desired location in order to apply the new color. | Choose the color you desire, select set, and the color wheel should have changed. Now, click and hold on the wheel, and drag the color to the desired location in order to apply the new color. | ||
*Note: You can select colors from either left or right side, whichever side you select, the project will print entirely that color. | *Note: You can select colors from either left or right side, whichever side you select, the project will print entirely that color. | ||
| + | |||
| + | When you're ready to print your design, select "Build." This will open the "Build and Print Settings" page, the following is a list of settings you can change: | ||
| + | |||
| + | #Layer Resolution | ||
| + | #Density | ||
| + | #Fill pattern | ||
| + | #Apply supports if necessary (selecting it from the correct color and location.) | ||
Revision as of 13:56, 20 October 2016
Printing with Cube 3D printers
The cube 3D printer builds physical objects from digital .CUBE files.
Creating a .CUBE file
On any of the available computers in the _Space, locate the app titled "Cube Print" (this should be easily found on the desktop). Once the app is open, choose "ADD" on the upper left of the application screen. From here, you can import any .stl or .obj file.
After your file has been imported, you can select it on the application screen, and press "Print Now."
- Note: You cannot edit a .CUBE file. If your file is already a .CUBE file, you can press "Export" but you cannot press" Print Now"
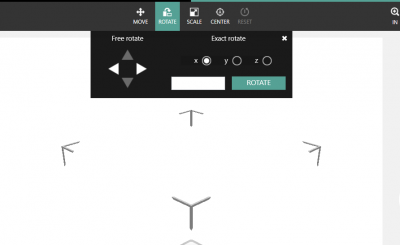
In the Editing screen, you can apply any necessary changes, such as moving, rotating, scaling or centering the object. To do this, first select your object, and and click any of the options located above your design.
To Choose Specific Colors
Select one or both of the color wheels, located on the left and right of the screen. Each side corresponds to the respective side of the 3D printer nozzles. Choose the color you desire, select set, and the color wheel should have changed. Now, click and hold on the wheel, and drag the color to the desired location in order to apply the new color.
- Note: You can select colors from either left or right side, whichever side you select, the project will print entirely that color.
When you're ready to print your design, select "Build." This will open the "Build and Print Settings" page, the following is a list of settings you can change:
- Layer Resolution
- Density
- Fill pattern
- Apply supports if necessary (selecting it from the correct color and location.)
