Basic Scripting
*Work in progress page!*
With Unity you can use javascript, c#, or boo, and while the 3 are somewhat similar, there are some major differences. I'm only going to talk about c# here as that is what most Unity users use and the language you will find the most helpful online answers for. If you don’t already know C#, please go learn it first. A good c# tutorial. This scripting guide can be skipped to come back to later, but it is highly suggested that you go through this material at some point.
Another small note: my editor for scripts looks different from the default of Monodevelop but it works the same way and the code is the same as it would be if I was using MonoDevelop. If you want to use the same one as me it is called Sublime Text, but this is entirely a personal preference.
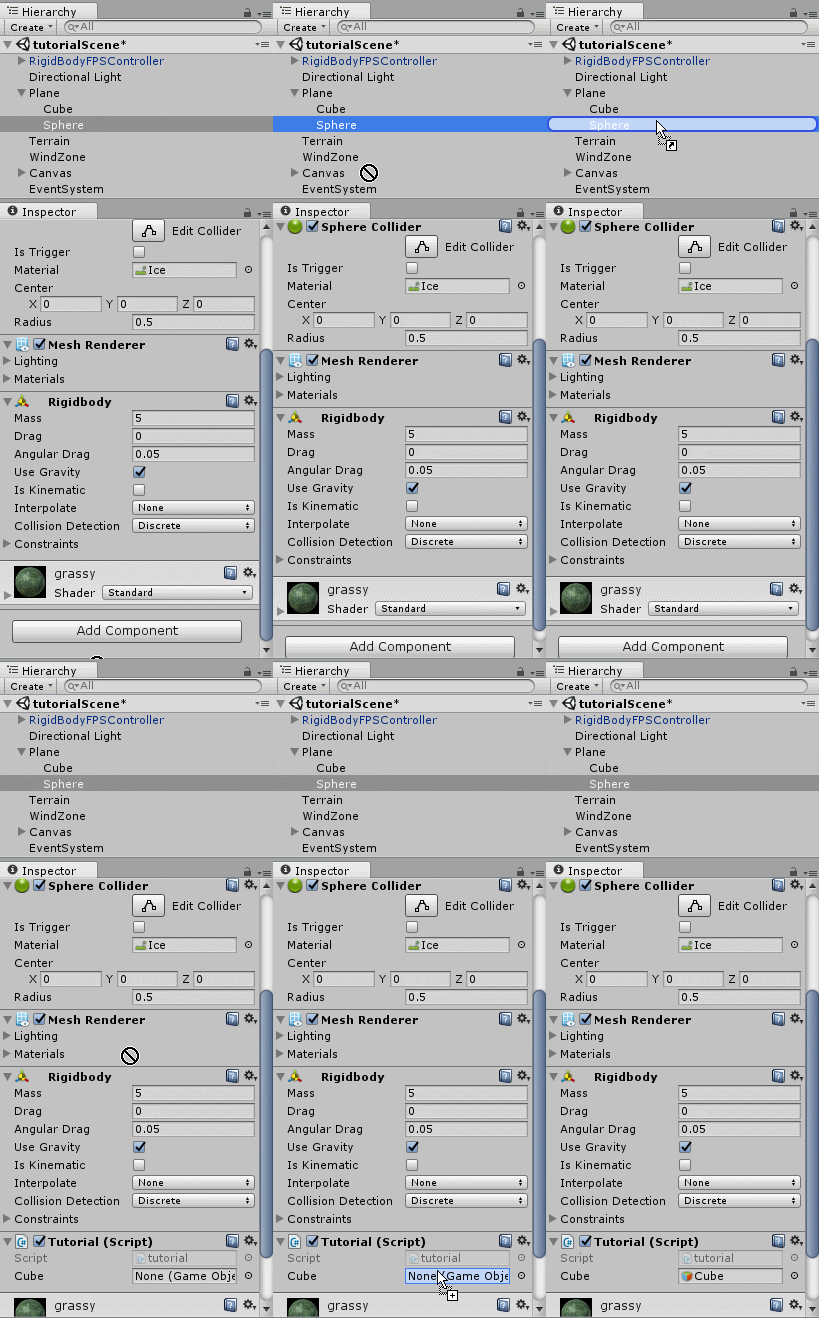
To create a new script go to your project tab and right click anywhere then Create > C# script. Name it whatever you want, as long as you can remember it. You can also add a script onto an object by using 'Add Component' and either finding or typing in 'New Script'. Scripts actually can only ever affect things in the game if they are attached to an object. Any script you make can be found by searching when using 'Add Component' or dragged onto the object in Hierarchy or when an object is in the inspector.
Say we want a specific cube to be half its size when we press the 'h' button in-game. In that case we first need to know which cube to resize, you can do that either by having the script be a component of the cube in question, in which case you don't need to do anything else to know which cube, or you can have the object be a variable you pick.
Contents
Detecting keyboard input
To check whether the H key has been pressed say
if(Input.GetKeyDown('H')){
   print("H key has been pressed!"); }
This will make a "H key has been pressed!" message appear in the Console tab upon the first frame an 'H' key is pressed (so it only does the thing between the curly braces once for every time the user presses the button).
Vector and transform manipulation
Continuing with the example from the previous section, to then resize that cube on that signal, you would change the code within the curly braces of the if statement to:
- if the script will be going on the cube:
transform.localScale = new Vector3(0.5f, 0.5f, 0.5f);
And you don't have to do much else besides make sure the script is on the proper game object, of course.
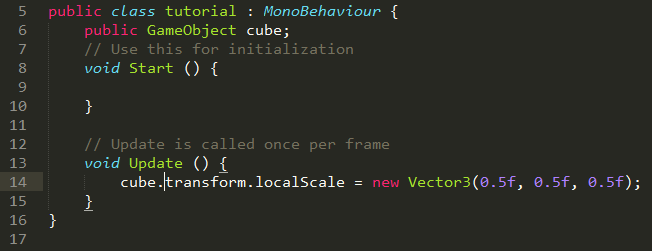
- To change the cube if the script is a component of some other object that isn't the cube, your code would look more like this:
The declaration of cube and its placement before Start() is important so it has the right scope for it to a known variable in both Start() and Update().
The script can then be placed on any object in the scene, but you will have to tell it what cube is.
Timing
Start
Start() is often where you initialize variables, or where you can call a function if you only want it to happen once at the start of play.
Update
Update() is called once per frame, and is probably where the bulk of your code will be, or at least where it gets called.
Awake
Awake() is called right before Start() or after the object the script is on has been instantiated. If the object is deactivated at startup, Awake() is still called when, or if, the object is set to active.
Activation/ deactivation can be toggled in the inspector. 
It can also be toggled via script by saying {object}.SetActive(true); or {object}.SetActive(false);, and {object} must be of type GameObject.
FixedUpdate
Most physics-related updates should happen in here because physics changes are done directly after FixedUpdate(). FixedUpdate() is also different from Update() in that it happens at a fixed rate while Update() varies based on the framerate the game is currently running at.
For more information visit Order of execution
Getting components and their attributes from Game Objects
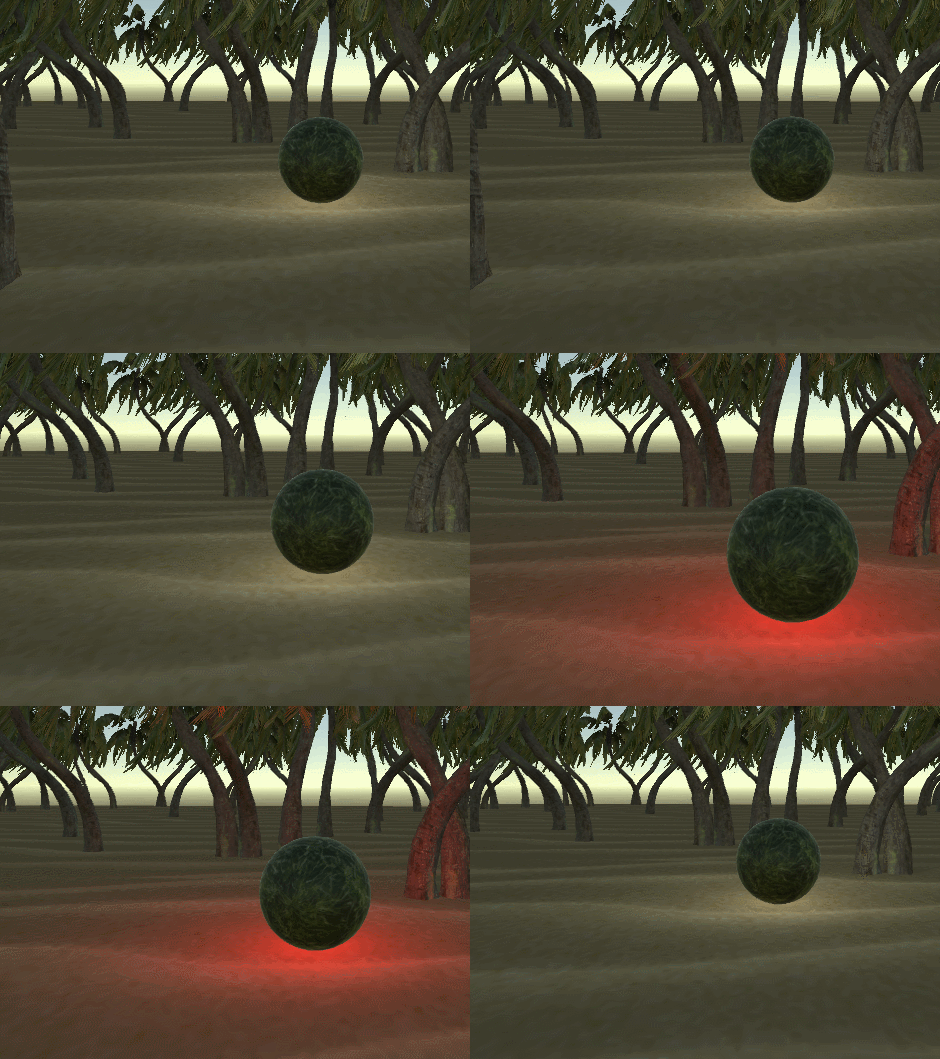
Say you want to change the color and intensity of a light, but only when the player is within a certain distance of it. The easiest way to do that would be to write a small script and attach it to the light object. We'll start with finding out all the components and variables the script needs to know about to achieve this, and that would include the player object, the threshold distance between player and light for when you want the light to change, and the new values you'd like the light to have. Saying public in the declaration makes it so those variables can be given values in the inspector. The script will be on the light object for this example, so we don't need a declaration for that. However, we do probably a variable for the light component of the light object because although it can be gotten through a function call multiple times, it's probably easier to only call that function once and save the result to a variable. Lastly we declare a variable to save the distance between the player and the light, that will be changed in update so it doesn't need to be initialized yet.
  public GameObject player;
  public float intensity;
  public Color color;
  public float threshhold;
  Light lightComponent;
  float distance;
Those last two variables don't need to be public because they won't be looked at by other scripts or given value in the inspector. For lights, range and intensity are both floats, and in Unity at least, Color is a type. To get the light component you have to use GetComponent<Light>(); on the game object, but if its just on the object the script is attached to, you don't actually have to specify that GameObject. Set that equal to your lightComponent variable in the Start() function.
The update function is gonna be where some action is finally happening. First we have to see what the distance between player and light is. Position has the type of a Vector3 (or a vector in the 3rd dimension) so we can use the Vector3.Distance() function to easily figure out the math for us and the function returns a float so we can save it as our distance variable that we declared earlier. Now we can check if the distance is below the threshold, and if it is, make all those changes to things in the light component. All the attributes happen to be named the same things as the variables I made, but they absolutely do not have to be.
void Update () {
     distance = Vector3.Distance(player.transform.position, transform.position);
     if(distance < threshold){
           lightComponent.range = range;
           lightComponent.intensity = intensity;
           lightComponent.color = color;
     }
}
One problem that you will probably see with this code when you try it out is that once you get into range and then leave, the light stays the same, it doesn't go back to how it looked before! Let's fix that.
First we need to add two variables to hold the original values, like
     float origIntensity;
     Color origColor;
Then we have to initialize those values and the best place for that would be in Start() so it's only done once.
     void Start () {
           lightComponent = GetComponent<Light>();
           origIntensity = lightComponent.intensity;
           origColor = lightComponent.color;
     }
The last step is to change the color back, our intended result, so we add an else to the end of the if statement we originally had checking the different between distance and threshold.
           else if(lightComponent.color != origColor){
                 lightComponent.intensity = origIntensity;
                 lightComponent.color = origColor;
           }
You also can't really see the change in light very well unless you attach the light to an object, especially if you are using a point light.
Empty Game Objects
They're actually kind of useful! You can put scripts on them and make it a kind of "manager" of the rest of the objects in the scene. So all the scripts can be in one place if you want and that might make things easier. To make one go to the GameObject menu (by right-clicking or finding it in the top toolbar) and choose "Create Empty". It just looks like a point in space when you first place it down, but it can be used as an otherwise featureless container for many different objects that you want grouped together. Or as I said before, it can be used as a scripting "manager" of many scripts that affects other objects in the scene. It can even be both of those, if you want. Lastly, you may find it useful to know that you can attach visual tags to objects to make it easier to see different things in the scene view. Visual tags, or icons can be added by clicking on the colorful square next to an object's name in the inspector view and choosing an icon. The name of the object shows up when you use the long bars, doesn't if you use one of the smaller icons.
Tags
Game Object tags are useful as it lets you filter between objects based on keywords you can choose, and they don't mess with the object name as the tag is a separate property of the object. Add as many tags as you want, and then when you're in a script and have access to any game object, you can check its tag by using {Game Object variable name}.tag. Or you can search within the child group of an object and return all the child objects that have that tag using
{GameObject}.FindObjectsWithTag("tag word in quotes";
You can also just use it without {GameObject}. coming first, and that will look for objects in the whole scene with that particular tag.
Colliders and Collision Detection
Say you want something to happen only after the object collides with something, or maybe you want it to do something different depending on what it collides with. That's where the OnCollisionStay(), OnCollisionEnter(), and OnCollisionExit() events come in useful.


