Difference between revisions of "GIMP"
From __space Wiki
| Line 1: | Line 1: | ||
| − | |||
Gimp is an open source raster graphics editor. While it cannot be used to create a vector, other programs that are available on _Space.URI computers such as corelDRAW and Inkscape are great alternatives if a vector is needed. | Gimp is an open source raster graphics editor. While it cannot be used to create a vector, other programs that are available on _Space.URI computers such as corelDRAW and Inkscape are great alternatives if a vector is needed. | ||
Latest revision as of 12:34, 2 May 2018
Gimp is an open source raster graphics editor. While it cannot be used to create a vector, other programs that are available on _Space.URI computers such as corelDRAW and Inkscape are great alternatives if a vector is needed.
Learning to use GIMP
GIMP has many tools, the main ones to know however when working to make a raster is:
- The tool bar, the main features to use from it are Image and Tools. In the toolbox(Positioned on the right hand side) the main tool to use is Select.
- Image, located on the top left hand side of GIMP, had various tools within it. The main one to use is Mode though Crop to Selection can be used if what you've selected in an image is much smaller than the rest of the canvas.
- Within Mode there is 5 options. RGB, Gray scale and Indexed are the most important to understand when making a raster.
- RGB is the normal setting of a image, where colors at selected via 3 channels of colors(Red,Green and Blue) allowing for greater intensity of colors.
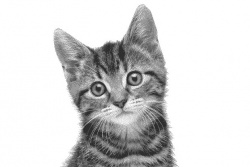
- Gray scale changes the image so that the images colors are flattened and converted to 256 values of gray, with each pixel being adjusted on a 0(white)-255(black) scale of brightness
- Indexed changes the image so that it becomes a 8-bit image with up to 255 color variations, though GIMP lets you change the maximum amount of colors allowed. Dithering is just in case the image has more that 255 color variations, as without dithering images with more than 255 colors would have blotches or solid blocks of color where there should be subtle color variations.
- Crop to Selection is a straight forward tool, it crops down the canvas size to the borders of what you have selected.
- Within Mode there is 5 options. RGB, Gray scale and Indexed are the most important to understand when making a raster.
- Tools has many other tools in it such as a more selection tools, different paint tools and transformation tools. Color Tools is the main tool kit to be looking at in it however.
- Color Tools allows the user to to adjustments to either the whole canvas or the selected parts of it. There was various types of tools to do adjustments with such as Brightness and Contrast, Colorize, Hue and Saturation and Color Balance
- Brightness and Contrast adjusts the brightness of the image and the contrasts between the dark and lights.
- Hue and Saturation adjusts the hue, saturation and color weights on an active layer or selected area. Generally a pure color saturation that doesn't change the image's mode unlike Colorize
- Colorize renders the active layer or selected area into a gray scale before applying a color over it so it appears more like a colored glass. Gives a sepia like effect to images.
- Color Balance subtly adjusts the color balance in an active layer or selected area, making it useful for correcting colors in digital photos.
- Color Tools allows the user to to adjustments to either the whole canvas or the selected parts of it. There was various types of tools to do adjustments with such as Brightness and Contrast, Colorize, Hue and Saturation and Color Balance
- Select tool: There are 4 types of selection tools in the toolkit: Rectangular, Elliptical, Free and Fuzzy.
- Rectangular(Dotted rectangle icon) is a normal selection type along the lines of using the select tool in something like Paint.
- Elliptical(Dotted circle icon) is also like a normal selection type except for the fact that it selects in a circular shape rather than a rectangular shape.
- Free(Lasso icon) or otherwise known as a 'Lasso' select functions differently. The user sets an origin point on the image and then continue to put down points along the image until they return back to the origin point. Everything within the selected points will be selected, making this select tool the best for when you need precision.
- Fuzzy(Wand Icon), the last selection tool functions more like a quick Free Select tool where you just click on where you want to select and it'll select a that section until it hits the borders of it. It works the best with images that don't have too much anti aliasing and aren't blurry, as it may cause the Fuzzy tool to not select some sections of an image.
- Image, located on the top left hand side of GIMP, had various tools within it. The main one to use is Mode though Crop to Selection can be used if what you've selected in an image is much smaller than the rest of the canvas.
Using GIMP to create a raster
- Start off by opening the image file in GIMP.
- If you do not want the image to have a background you must select the parts of the image you want to show up before going into Select->Invert in the tool bar. After selecting invert, it is now possible to erase the background without erasing the main image.
- After the image has been cleaned up, the next thing to do will be going to Image->Mode->Indexed.
- A new box will pop up, generally the best settings are Maximum Colors:4 and Color Dithering: Floyd-Steinburg(Reduce Color Bleeding)
- Select image on the toolbar again but this time select Grayscale
- Clean the image one more time with Inverse Selection and the Eraser tool before adjusting the image with Brightness and Contrast
- When saving in GIMP unless you hit export file, the image file will be saved as a .xcl file be sure to export your file so that it will not be saved as a .xcl
- Afterwards you'll need to bring the file to corelDRAW to finish the rest of the raster prior to printing. Instructions on how to do it will be found at Laser Engraver
Tips & Tricks
- If you missed a section that you want to select but don't want to deselect what was already selected you can hold the shift key to add to your existing selection.
- Likewise if you find you've selected too much just simply hold the ctrl key and you can deselect from your existing selection while it is held.
- If you want to select one color in the image but it's not all joined together, you can use Tools -> Selection Tools -> By Color Select. This will select every instance with the same color value in the canvas. Has some issues as it will only pull the same color values, so even if it's off by a bit it won't be selected.
- GIMP also has a online tutorial guide on how to do various tasks within the program. The link can be found here: https://docs.gimp.org/en/index.html


